Showing posts with label makerspace. Show all posts

Tuesday, May 23, 2017

BVSD Mobile Maker Kits - Reflection

So I was one of the BETA-testers for the Mobile Maker Kits.  There were many opportunities for learning provided by these kits--including a chance to try out new and different components--yet one of my key findings was the leveraging the power of the classroom teacher for increasing student access.

The Challenge

Upon my first introduction of Maker Kits to the school--I started a Maker Club and held open maker times in the library during lunch.  This brought in interested students, yet I was underwhelmed with total numbers.  I connected with rough forty to fifty students during those initial months and only had twelve to fifteen consistently attending the Makers Club.  A good start but not as large a group as I had initially hoped.

First Steps with the New Components

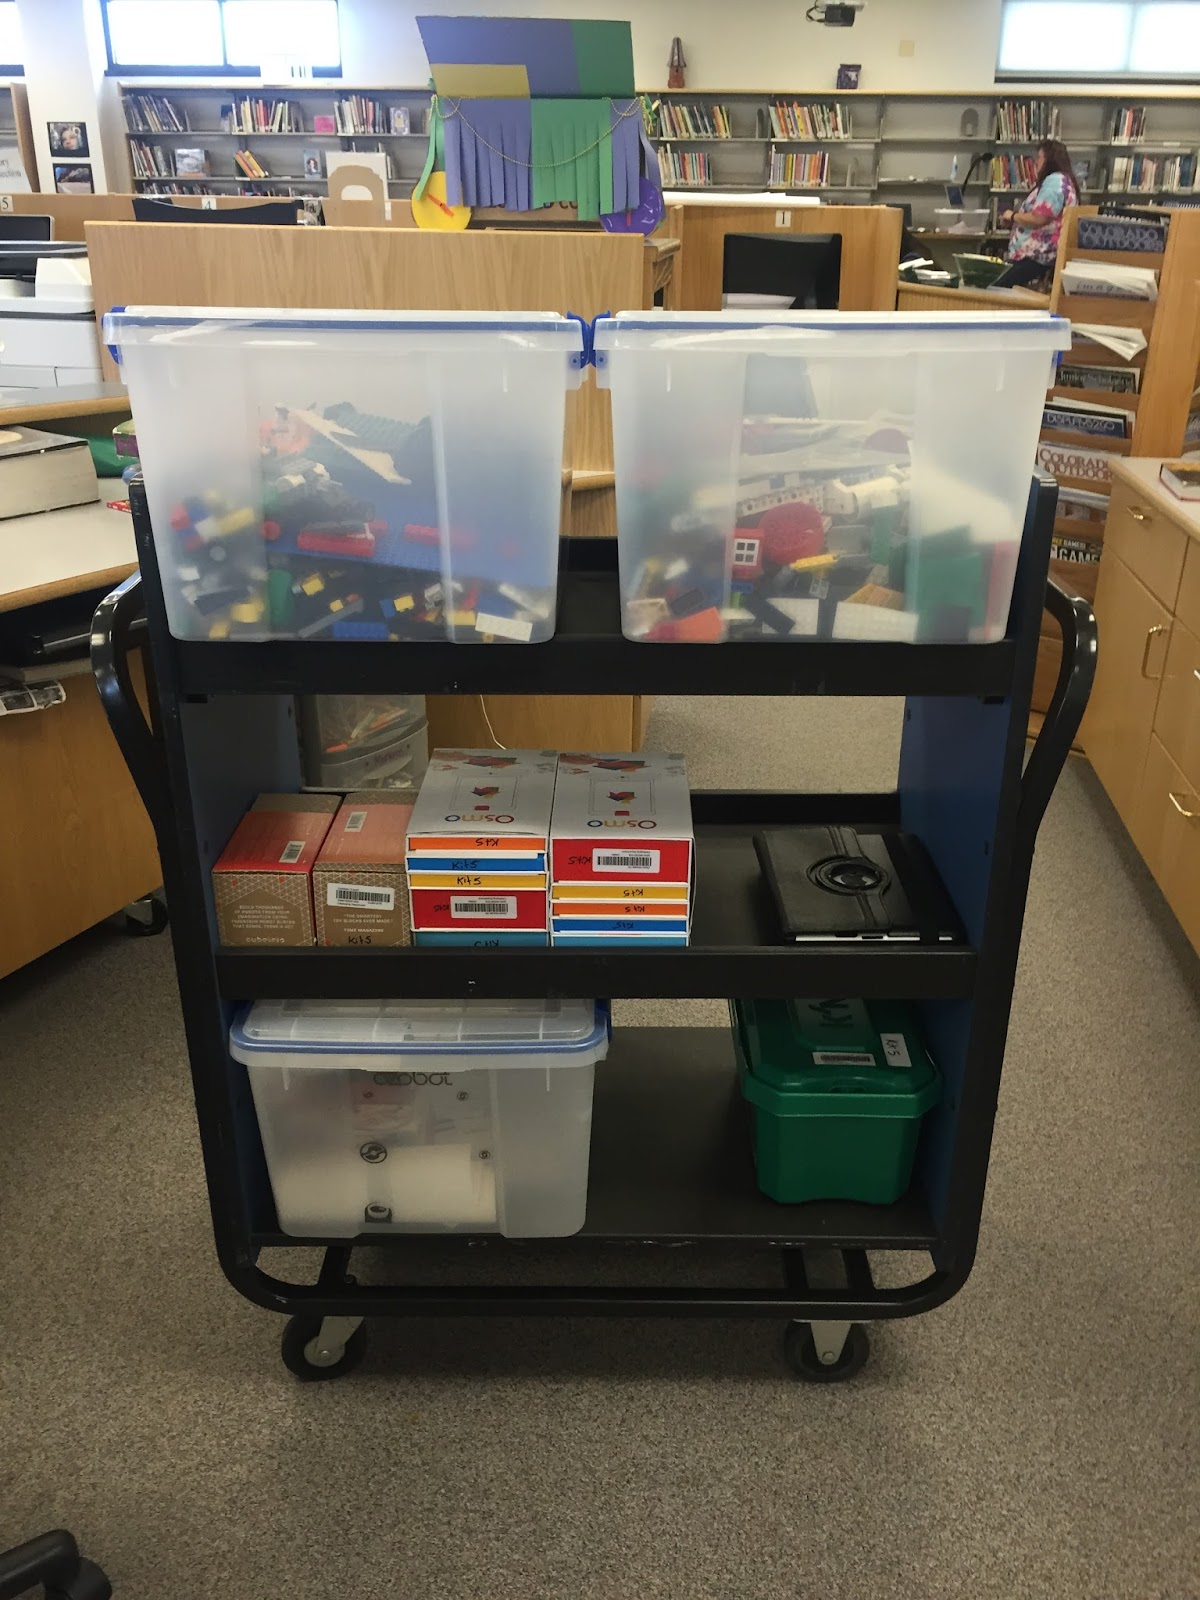
 I started by just putting out some of the Maker Kits on a table that was viewable from the checkout desk.  Curious students started expirementing with KEVA planks or trying out the Ozobots with no prompting.  This captured a few students.

The Big Question

Then I had a key learning:  In order to capture more students, I had to involve teachers.  The question remained though: How do I engage teachers who already feel stretched in their classroom duties to involve them in making?   


Curiosity drives us to learn.  Curiosity sparks new ideas.  Curiosity is the gateway to trying something new. 

I sparked curiosity by setting out a few OSMO stations before a faculty meeting and had a few teachers try them out.  Then during a Teacher Share Fair organized by our professional development committee.  This was a rotation of teacher led activities or lessons that teachers could attend.  I put out a number of stations for teachers to try.  Minimal instructions and just had teachers explore and play.  Teachers immediately were engaged and started asking questions about the kits and how they could use them.
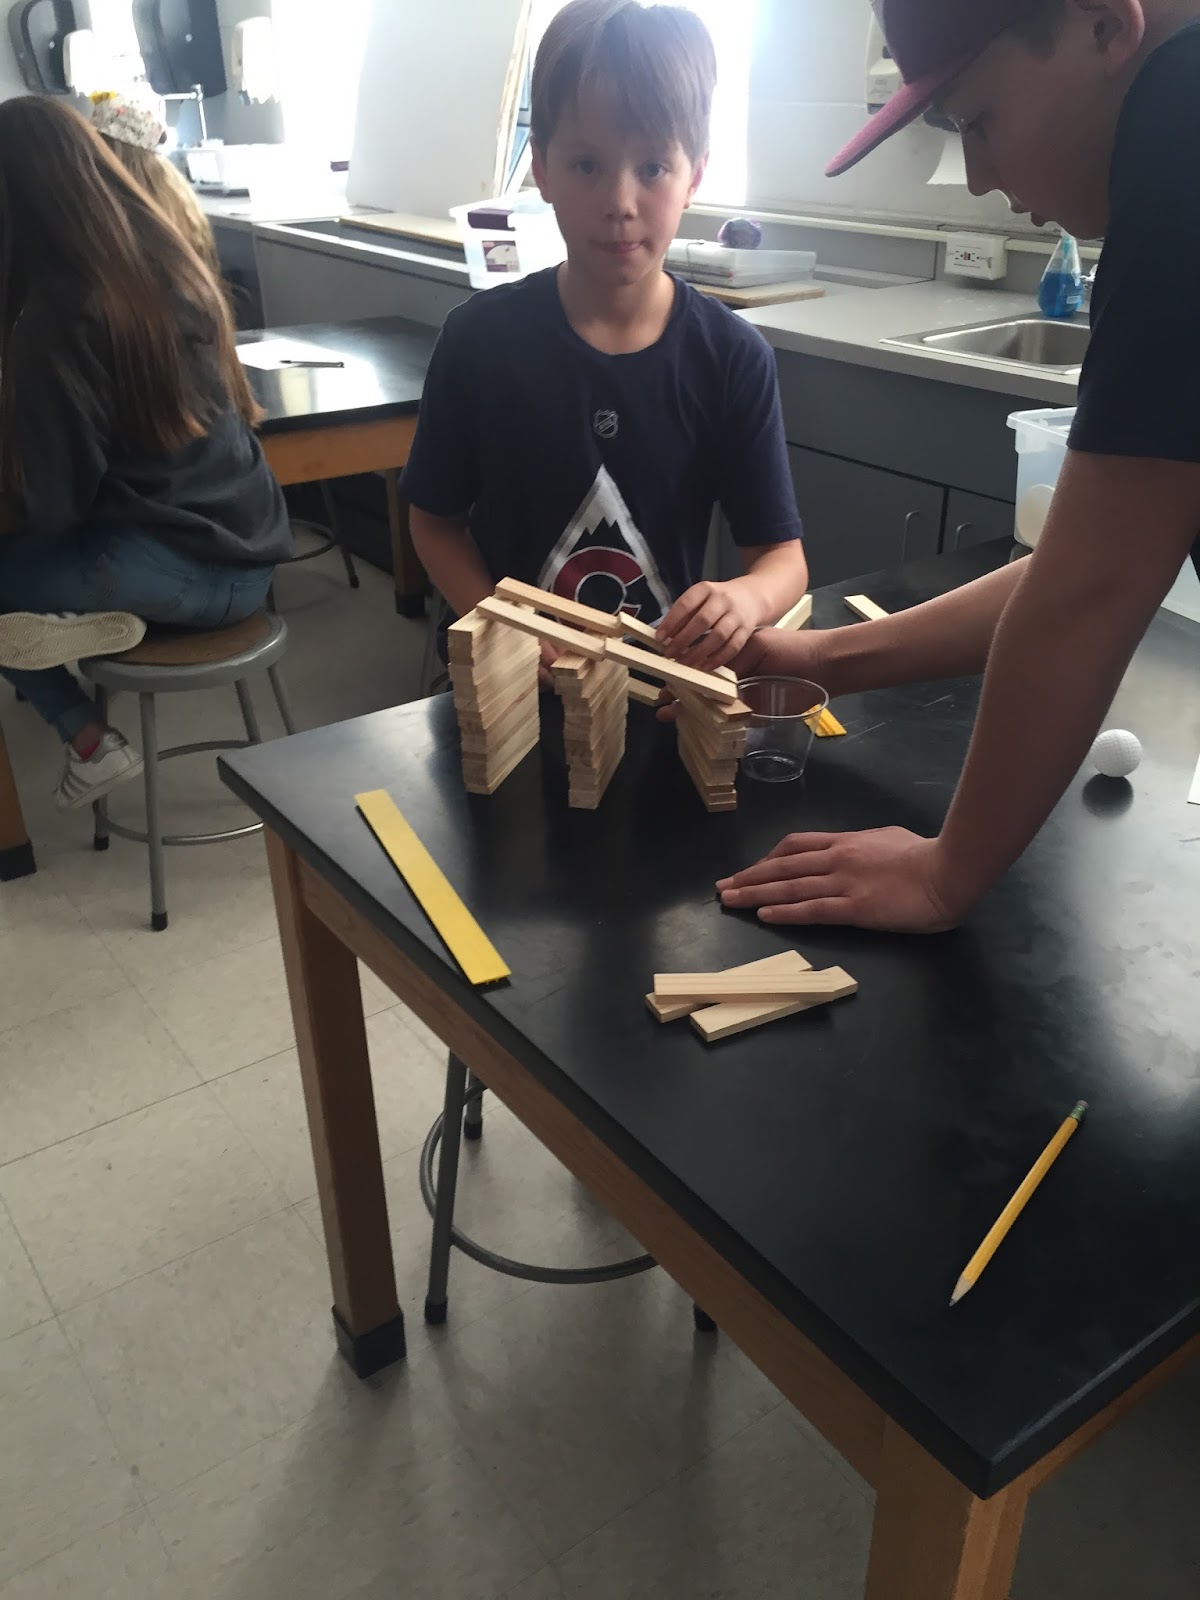
SCIENCE SUCCESS!!

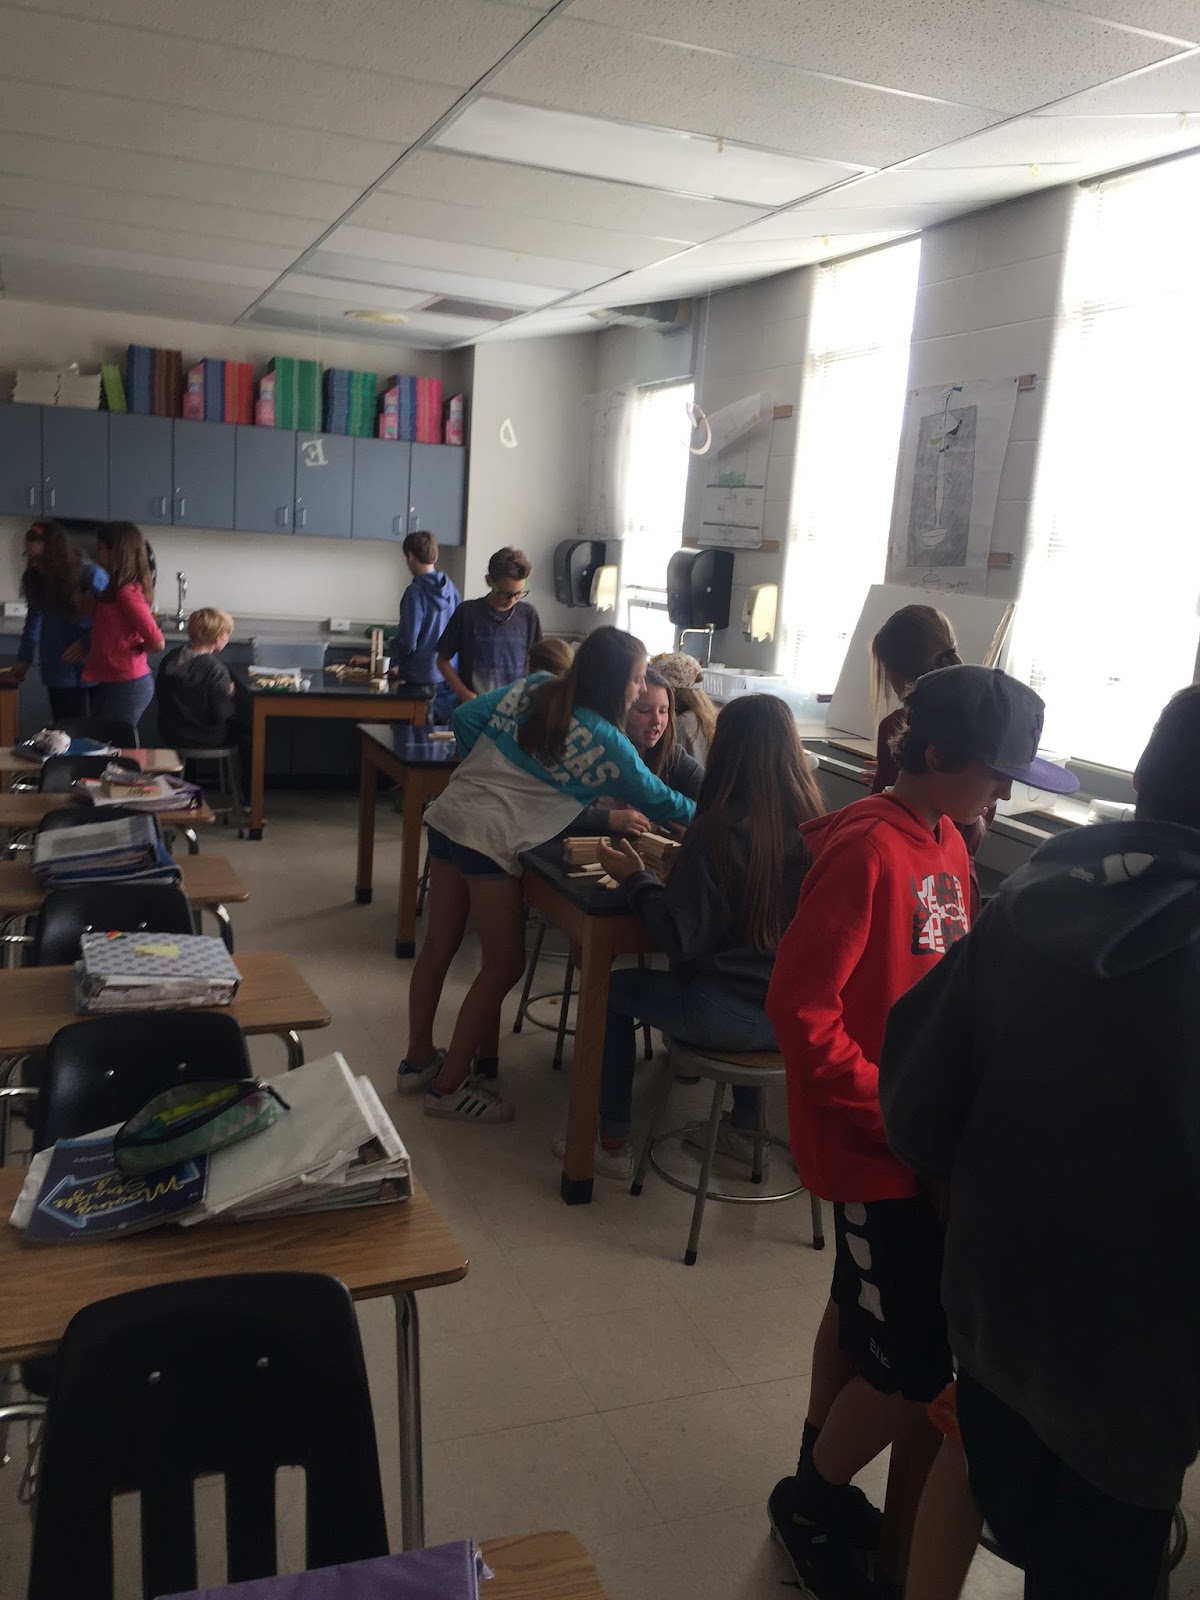
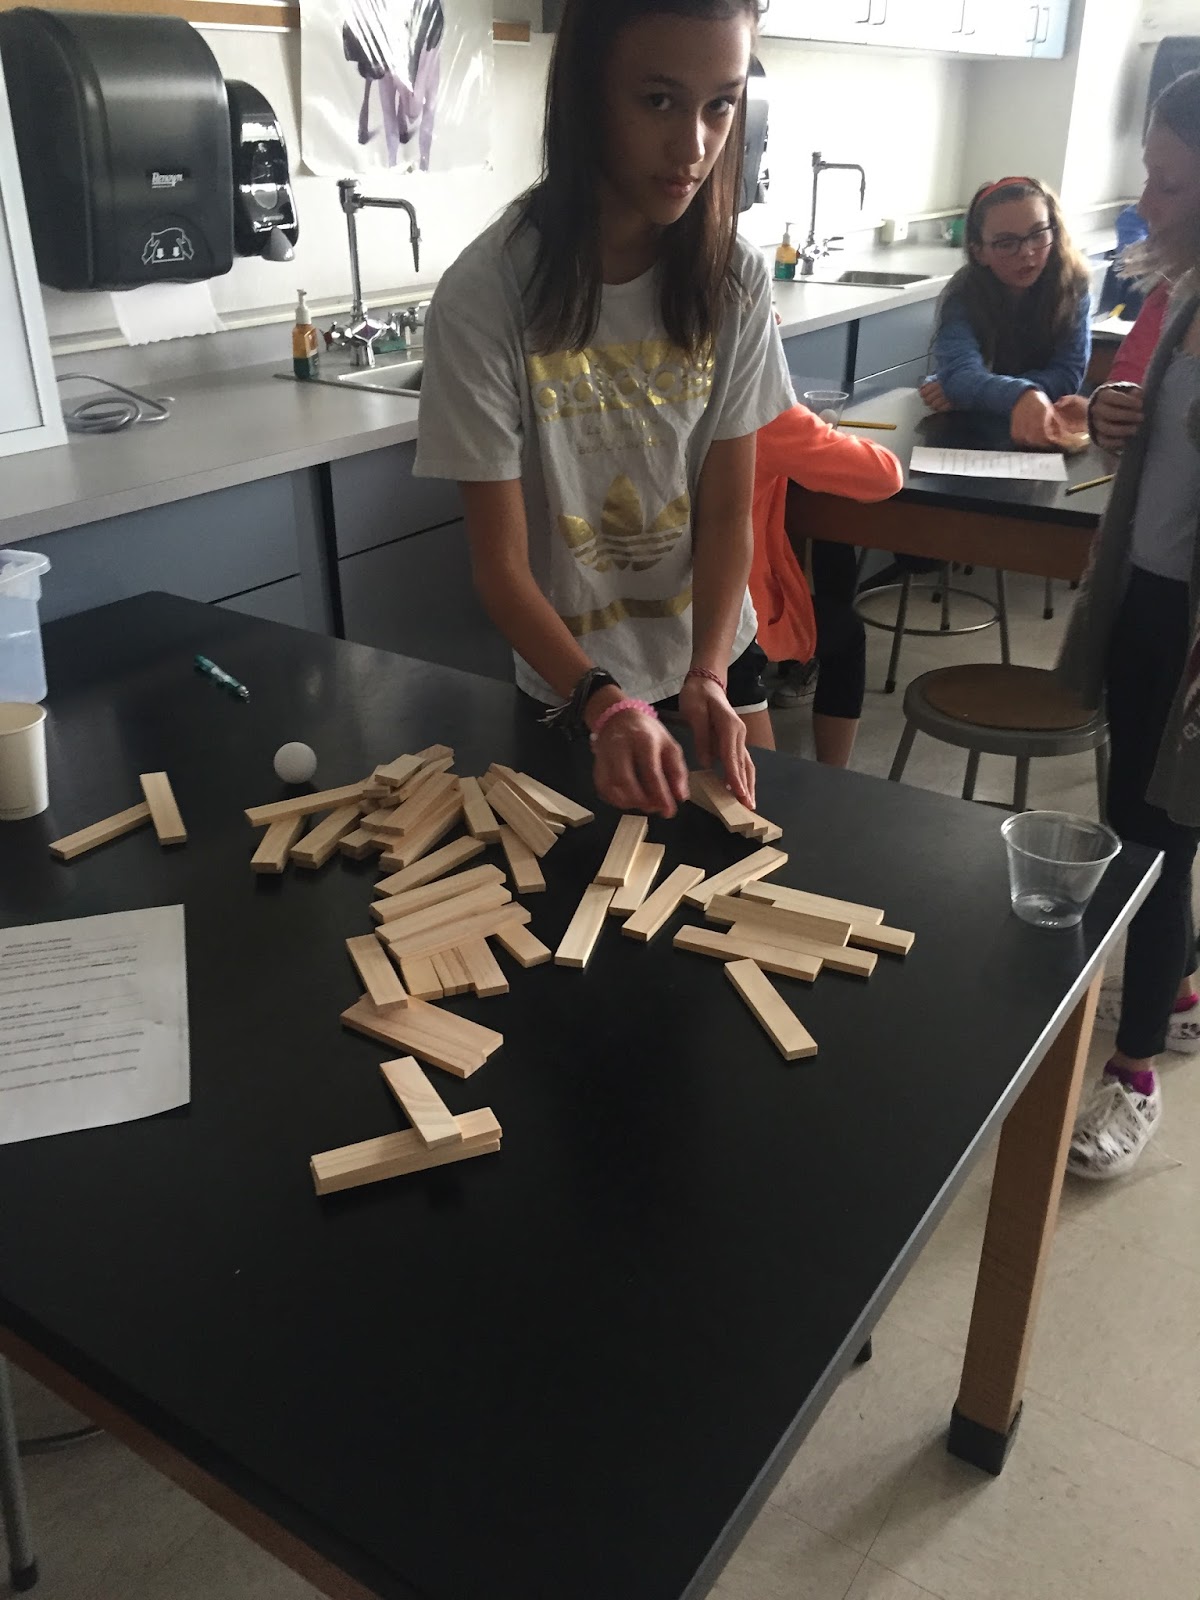
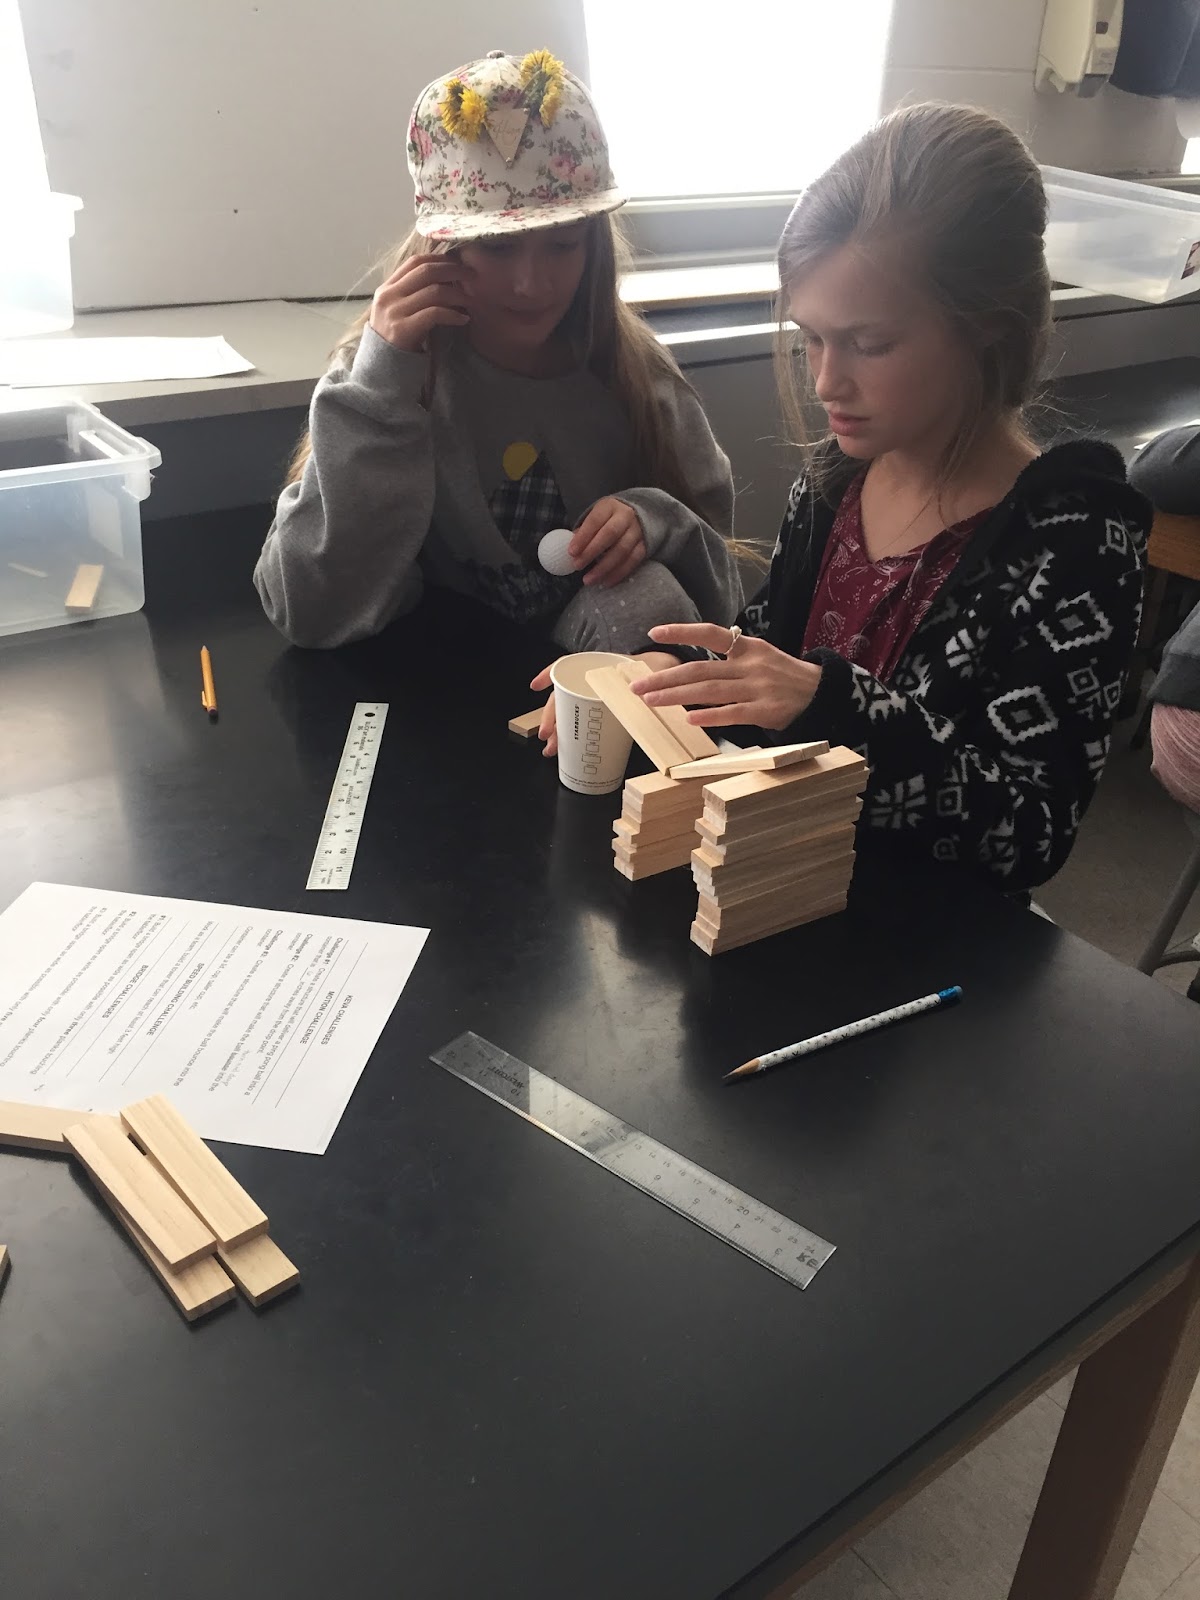
From this event, I enlisted two 6th grade science teachers that rotated the kits through their roughly 200 students.  After seeing this success I approached 7th Grade Science teachers to see if they would want a day of Makerspace rotation.  I was then able to enlist one day for the entire seventh grade--check another 150 students.  

It was exciting to see the students' faces light up when they walked into their science classes and saw all of the kits spread out for them to try out.  Some students had some experience with some of the kits but at least every one found one they had not seen or used.


The key was this wasn't difficult for myself nor the teachers.  I just had to make sure I had enough stations for students to rotate through--seven or eight and also make sure the components were charged.  I actually brought in a charging strip so I could charge on the fly and also had four ipads ready for the Osmo station--so we could switch them out when they ran out battery life.

I would highly encourage this strategy to any teachers/librarians who would like to get the kits into students' hands.


Tuesday, April 18, 2017

Maker Kits Part 2: Promoting the Kits

So originally I believed, Build it and they will come!"  So if I assemble the kits, make them easy to check out and then teachers will be clambering to check them out...well not so much.  What I did discover is if I promoted the kits, then word would spread.

So here are some of the techniques I used.

#1 Create Design Challenges and Invite Classes & Promote the Kits

I used the marshmallow challenge (link to slide presentation), yet there are a number of low-tech challenges that can incorporate collaboration and easily can be fit into a class period.  My lesson before has been to show off some of the kits and then have the students work through a design challenge as a class.  This also gives you time to talk to the teachers about possibles uses and check out procedures.
#2 Seek out Teachers to Schedule Classes  

For flexible scheduling libraries such as mine, teachers will sign out times for research, yet will be unaware of the available kits.  As my grant targeted Emerging Bilinguals and students in Academic Support Classes, I sought out those classes to schedule days to try out the kits.  Initially, I held a rotation of duct tape crafts--where we made flower pens, K'Nex building, LEGOS and Ozobots.  This gave students the opportunity to explore the different kits and the teacher to see how they could use them.  Afterwards, I found teachers were more likely to check out kits for classroom use.

#3  Share at Faculty Meetings or Organize A "Share Fair"

Schedule time during a faculty meeting or just pull out some of your kits, either formally or informally, and have teachers explore.  Also, being a part of our school's Professional Development Committee, I helped organized a teacher share fair.  This was a choose your own adventure PD where teachers gave short (10-15 min.) presentations on something other teachers could use in their classroom. Teachers singed up and then rotated through presentations of their choosing.  I gave two short presentations on the kits and let teachers explore them.  This led to the two science classes signing up to use the kits for multiple days (see below)

#4  Organize a Station Rotation in Classrooms

I collaborated with a science teacher to do a rotation during her 6th grade Science classes of a mix of the district kits and some of the mobile kits I’d set up from my grant.


Kits/Stations
#1 OSMO Station
--Two Osmo set ups with i-pads

#2 Ozobot Station
--three ozobots
--bowling challenge

#3  2 Little Bits Music Station and headphones-in five way splitters

#4  Lego Station #1 w/ challenge cards

#5  K’Nex Renewable Energy w/ Motors

#6  Cubelets & Moss Robotics

#7 Lego Station #2 w/ challenge cards


I used an old library cart to move the kits down to the classroom as the library was booked for another class.
File_000.jpeg

It was great to watch the kids walking in and their eyes lit up as they saw all the kits spread around the lab tables.  I then oriented students to the different kits and then they were turned loose. “They were so engaged from the beginning.  This is really cool,” noted Mrs. Scherer, the teacher.  

As I circulated the first part of each period that I oriented, I noted students working on different kits--collaborating and problem solving.  The students were respectful in sharing ideas and thoughts.  “I liked that we didn’t have many directions.  We had to figure it out for ourselves,” noted one student. Another student excitedly showed off her cubelet robot she had constructed and her partner excitedly asked, “How did you do that? Can you show me?”

IMG_4612.JPGIMG_4619.JPGIMG_4610.JPG


Across the hall, the other science class was using the Keva Planks to construct different challenges.  “You can tell the students who are really into design and engineering really take to it,” noted Mr. Johnson, the science teacher.  I watched as students worked together and proudly displayed some of their challenges, such as making a ping-pong ball connect using a right angle.  Of a classroom full of roughly twenty seven students, I only noticed a sparse few that were not engaged.  

The other advantage of this was that once I oriented teachers to the kits, they were able to take over and I didn’t even have to visit the classroom anymore after that.  

Overall this was a great success in student choice and having the students explore the kits without much teacher-led direction.

IMG_4608.JPGIMG_4609.JPGIMG_4607.JPG


Wednesday, December 14, 2016

Maker Kits Part I--Setting Up Kits/Storage

Centennial's Maker Kits and Maker Club have been up and running for the past few weeks.  The Maker Club meets after school every other Monday, for about 1 hour.  Also, the kits are starting to be checked out and I have had seven classes visit stations up in the library.  In this post I will share some of the learning about setting up the Kits--what's in them and how I store them.  The next post I will cover how I pushed out and publicized kits.

First of All--a Shout Out to Jessica West!

Jessica West, who is part of the dynamic duo at Heatherwood Elementary's Library, was fulfilling her practicum hours at Centennial Middle School.  The Maker Supplies were just crammed into a cabinet.  She helped me inventory what we had, figure out how to maximize the space and also helped roll out the Maker Space to classroom visits.  Thanks Jessica, I couldn't have done it without you!

Where Did You Get the Money?

I wrote and was awarded a National Educators Association Student Achievement Grant last year for $2,000 to start a Flexible/Mobile Maker Space.  As part of the grant, I targeted students who were in academic support classes and therefore had less access to elective classes offered at the school.  More on how this went in the next post. Click here for more info. about the grant.

What have you Purchased and What Insights Did You Gain?

So far, I've spent roughly $1,150 of the grant and definitely learned some things along the way.  Here are the kits I have set up so far and some insights on each:

_____________________________________________________________________

Duct Tape Craft Kit

Duct Tape Craft Materials

15 Rolls Duct Tape
7 Scissors
2 Skill Scissors
1 Pen Knife
3 Measure Mats
5 Rules
6 Sharpies
Tape It & Make It Book ($15.00)
Approximate Cost: $90.00

Insights

Students love the duct tape craft tub.  There are bunches of duct tape crafts that are fairly easy to make.  I found a simple video on how to make a duct tape flower pen and have been using that as an intro. to duct tape crafts. Also, the book Tape It, Make It was a good resource although some of the directions were complicated, even for me.    I get a little nervous when students use the Pen Knife but Most are responsible with it.

Ah-Ha's/Things to Consider

One thing I am changing are the scissors I am using. I invested in Fiskar 5"Scissors for the smaller ones and they work much better than the other cheaper. batch scissors I ordered.   The other scissors gum up and I have to clean them after each use, so I invested in more expensive Fiskor Scissors and am anxiously awaiting their arrival.  The best way to clean scissors I've found is with rubbing alcohol and a sponge.

Also, consider that duct tape is a consumable resource.  Students love it because they make something and can take it home, but plan in your budget for more duct tape purchases.  I started with six solid colored tape and a 12 roll variety of patterns, that I ordered on Amazon.

_______________________________________

OzoBot Kit

3 OzoBots
3 Sets of Markers
Random Ozobot Cards
3 Sets Small Plastic Bowling Pins (for Ozobot Challenge)

Approximate Cost: $180.00

Insights

Ozobots are programmable robots that use light sensors.  You can draw and they can follow a pattern.  Also, they can be programmed via a website with drag and drop code.  The Ozoblockly website also has challenges and classrooms activities.

Things to Consider
I've found the Ozobots to be a a reasonably priced entry into Robotics for students.  They can be glitchy at times and take a little practice to figure out.  Also, they are tiny and easily could walk out of a makerspace, so I always "bird-dog" them when they are out.  They do definitely have a Wow factor.  One of the favorite activities is the magical eight ball where you ask the Ozobot a question, and then place it on the mat and it randomly ends up on a "yes", "no" or "maybe".  I want to explore and learn more about Ozobot but am still learning.

_____________________________________________________________________

K'Nex Building Kit


K'Nex 70 Building Set
K'Nex 52 Building Set
4 Motors
Approximate Cost: $150.00


Insights

K'Nex are plastic hubs and rods that can be snapped together to make a number of different things.  Students have made frisbees, cars, and air plane.  I really liked adding the motors to provide power.  The students have enjoyed this tub and often explore and self-explore. which I helpful for me if I'm working at a different station.  Some students enjoyed making K'Nex vehicles and having a roller derby type race with them.

Things to Consider

K'Nex have been around for awhile and there are some websites out there that offer different K'Nex Challenges.  The K'Nex are reusable but not indestructible.  I have had a few break on me.  They also can be a little difficult to snap together or pull apart for smaller hands.   

_________________________________________________________________________________

Lego Kits (3 total)

Various Legos (donated)

2-3 Lego Baseplates (10' by 10")
Lego Challenge Cards
Approximate Cost: Legos donated -- baseplates 4/$20.00

Insights
Kids love legos.  Even middle school kids.  Maybe it's the familiarity.  Maybe it's the possibilities?  Also, I was very lucky to have three large bins of legos donated to the library.  I put out an all call to parents through an school e-blast and was able to get a generous donation.  Kids love to build but also I printed up a series of lego challenge cards (link above) that students can then pick a card, and then complete the challenge.  There's also a free Lego Movie Maker App you can load on i-pads and make movies, something I am excited to try it.
_________________________________________________________________________________
 Little Bits Synth Kit 
Approximate Cost: $150.00

Insights
I purchased a Little Bits Synth Kit with Bookfair Profits from Scholastic.  Little bits are snap together circuits that are easy to configure.  At first, I wasn't sure what to do with the kit, but then I just put it out there and let students experiment.  The synth kit allows them to build different configurations to make different sounds.  One student spent the entire hour trying out different parts and experimenting.  Other students would wander over and he would show them what he figured out.  I would call that Maker space Success!

Ah-ha
Although it's fun to let students experiment, if this was a classroom situation I would hook up the speak to headphones.  I have a five to one headphone jack that would allow a group of students to listen to the sound.  It's quite distracting otherwise.
_________________________________________________________________________________

Origami Robotics Kit

  • 26 Teknikio motor board
  • 26 Teknikio battery board
  • 50 batteries
  • 100 LED lights
  • 200 fasteners
  • 2 rolls of conductive tape
  • 1 roll electrical tape
  • 280 sheets of origami paper
Insights
Honestly, I bought this kit as I was looking for a stand-alone/already set-up kit that I could easily roll out.  I do like that this kit includes circuitry and motors and forces students to consider design-thinking when working with the materials.  On a down side,it was fairly expensive ($300.00) and I believe you could cobble together a similar kit for far less.  Teknikio sells the individual parts of the kit--and I'm sure you could find them elsewhere as well.  Also, I wrestle with the fact that students will want to bring the supplies home, but at the same time, they can be resused.  I'm still figuring out how to best utilize this kit.
_________________________________________________________________________________
STORAGE


So we have set up storage using plastic tubs that are bar-coded if they leave the library.  Jessica, Ziploc 44 Quart Tubs.  These are perfect for fitting in the cabinets and also transferring the contents of tubs.  We labelled the tubs and also bar-coded them so they can be checked out to teachers.  They also fit neatly in the cabinets.  I just ordered another set of smaller tubs--Sterilite 30 Quart-- to maximize storage space. Also, some of the kits do not require such a big tub such as the Origami Robotics or Ozo-Bots.  


Thursday, April 7, 2016

Makerspace Marshmallow Challenge

So we kicked off the Centennial Makerspace by having a four classes conduct the marshmallow challenge.  Students self-selected teams of no more than three--although we did allow four in one class, and then were given the challenge.  The essence of the challenge is students are given the following materials:
  • string
  • 20 stands of spaghetti
  • tape
  • a marshmallow
The Challenge:  Create a stable-freestanding structure that can suspend a marshmallow. They had 18 minutes.  To learn more about the challenge click here.

The students loved the challenge.  They were engaged from the start: sharing ideas, prototyping, collaborating and talking.   The biggest challenge was not helping out the students by giving them advice.


OTHER MAKER STUFF....

The students were also introduced to some of the other projects they will be able to do in the Makerspace.  They were particularly excited about the duct-tape craft projects and the littleBits KORG synthesizer set.  Check out the presentation below:

The students had a great time.  I look forward to working with more classes and the future.  The Makerspace will be open for some free make time starting next week April 11th.  Listen for the announcements!
_________________________________________________________________________________
SOME BOOK LOVE!


Another book I am listening to with my daughter (9) and son (5) is George by Alex Gino.  George is 
in the fourth grade and has always felt she is a girl, even if she was born a boy.  She wants to play the part of Charlotte in the fourth grade production of Charlotte's Web, but boys are only allowed to try out for male parts.  George's teacher and mother and understanding, but not supportive of his gender identity.  This is a great book for bringing up discussion on gender, but not for every reader or family.  To learn more about the book, read the Common Sense Media Review.

So I am reading Read Between the Lines by Jo Knowles.  You can tell by the cover that this is an edgier book, I wouldn't recommend it for 6th or 7th Graders.  It tells the story of different high school students or recent graduates all surrounding the same day.  Their paths intersect and each story gives you an inside view of how difficult it can be.  I'm really enjoying it so far and would recommend it for 8th graders or above. 

Thursday, January 21, 2016

Centennial will have a Library Makerspace!

Hurrah!  The big news from Centennial's Library is we have been awarded a grant for $2,000.00 to start a Makerspace!  


What is a Makerspace?


An official definition is, "Makerspaces, sometimes also referred to as hackerspaces, hackspaces, and fablabs are creative, DIY spaces where people can gather to create, invent, and learn."(A Librarian's Guide to Makerspaces)

For me, it's a place for students to collaborate, learn, grow and explore by creating and just messing around with stuff.


What's the plan?


I plan to create a dedicated, flexible Makerspace in the school media center where students and staff can access new technologies (programming, wearable computing) and hands-on projects.(bookmaking, recycled crafts, duct tape creations, etc.)  

The space will be a place that can be packed up and consist of a few tables in the front of the library, so I can monitor it's use.  
I plan to introduce the space to specific academic support/language support classes with the marshmallow challenge, targeting students who have less electives and therefore don't have as much freedom to explore interests. I am aware that the marshmallow challenge is more scripted and less free-form, but I thought it would be good way to introduce the space. Click here to learn more about the marshmallow challenge.

After introducing the space I plan to introduce some stand-alone projects. I stumbled on Teknikio, a company that offers packaged Makerkits that are reusable and can serve up to twenty five students. They are packaged with a teacher guide and project ideas. These would be a great way to explore Makerprojects, as well as serve as a jumping off point for other projects. The two I am interested in purchasing are: The activating Origami Workshop Kit. A reusable kit that allows students to add electronics to Origami Paper. Second, the Fabtronic Sewing Workshop a set that teaches the basics of electronics and fashion. Some of the critical thinking skills students will engage in is how to best use materials and how to solve problems as they arise with different projects. I also have plans to purchase craft supplies, and other project materials such K'nex are engineering tools.

Eventually, I would love to train students in leading some of these projects, and bundle some of these kits so they can be checked out by classroom teachers. I am very excited to start this exciting new opportunity at Centennial
_________________________________________________________________________________

And now, a couple of book recommendations....
I love books!

I just finished Surviving Bear Island by Paul Greci, a story of Tom Parker, a teenage boy who finds himself stranded on a remote island in Alaska after dumping in his kayak. What makes this classic survival story great is that Greci is a long-time Alaskan resident and he knows his environment. Tom struggles to survive, left only with a small survival kit packed by his father, he struggles against starvation, hypothermia and yes...Bears! A great read. If you liked Hatchet by Gary Paulsen, you'd like Bear Island. Appropriate for any middle schooler.

I also want to recommend Chris Colfer's series, The Land of Stories. My family took a multi-day drive from Boulder to Silverton this past summer for a wedding. We brought along the first book, Land of Stories: The Wishing Spell on audio book. It was a delight. Chris Colfer is one of the long-time characters on Glee and he reads the book. It's the story of two twins who find themselves magically transported into their grandmother's book of fairy-tales, but there are not your classic Grimm's Fairy Tales. They have many humorous twists and takes on the characters and situations. It kept the whole family including myself, my wife, my five-year old son and my nine-year old daughter entertained.

Friday, December 11, 2015

Boulder Public Library Reading Field Trip

So last week I accompanied Ms. Austin's Reading classes on a field trip to the Boulder Public Library.  We had been planning the trip all year and Ms. Austin had obtained forms for library cards for all thirty of her students.  Students were excited to visit and pick up their new cards.

Erica Starts the Tour

We were lucky enough to have an unusually mild sunny day and had a pleasant walk through the neighborhoods to catch the Skip downtown.  Erica Segraves, the youth services manager, met us outside and we started out tour of the library.  Check out the youth services link here.

If you haven't been to the recently renovated library, it's beautiful.  They have moved the children's section to a space that overlooks Boulder Creek.  Also, they have opened a cafe on the walkway across from the theater side to the library main.

One of the highlights was visiting The Teen Space. This opened last year and is a place for 6th-12th graders to relax, connect and create.   They have tools for creating digital movies, creating music or just playing games--both board and video games. The students were particularly excited about this space and I would encourage you go visit and check it out for yourself.

Adam Leads Students in Catapult Project 

The next stop was the new Maker Space.  The library is working and creating a Maker Project Space right behind the theater.  It will house a laser cutter, 3 D Printers, and lost of other cool stuff.  The library plans to host classes and workshops in the near future.

 Adam Watts, Creative Technologist, led the students in an activity where they used Popsicle Sticks, Rubber Bands, Tap and spoons to construct catapults.   The students all got to work.  We loved the hands-on learning and all projects.  

At the end, there was a catapult war with soft fuzzy projectiles, all in the name of Science.

Overall, it was a great field trip.  Thanks to Erica and Adam for hosting and to Amy Austin for all of the work putting it together. 


 What an amazing resource we have in the Boulder Public Library.  Go check it out!